Draw Lines Around a Circle in Photoshop

How to Crop Images in a Circle Shape with Photoshop
Tired of cropping your photos every bit rectangles and squares? Learn how easy it is to crop images equally circles with Photoshop, and how to salve the circumvolve with a transparent background so the image looks great in a pattern or on the spider web! A stride-by-step tutorial for Photoshop CC 2021 and before.
When cropping images in Photoshop, we usually think of rectangle or squares. That'south because the Crop Tool in Photoshop has no other options. Only who says nosotros need to use the Crop Tool? Photoshop makes information technology just as like shooting fish in a barrel to crop images using pick tools. And to crop an image in a circle, the Elliptical Marquee Tool is all we need.
In this tutorial, I testify you how to crop images as circles, and how to salve the circle with a transparent background so you tin can identify it in whatever design or upload it to the spider web!
I'chiliad using Photoshop 2021 just you can follow along with whatever recent version.
Here's what the image cropped in a circumvolve will look like when we're done, complete with transparent corners so it volition work on any background:

The final result.
Allow's get started!
How to crop an epitome into a circle shape
Step one: Open your image
Start past opening your image into Photoshop. I'll apply this image from Adobe Stock:
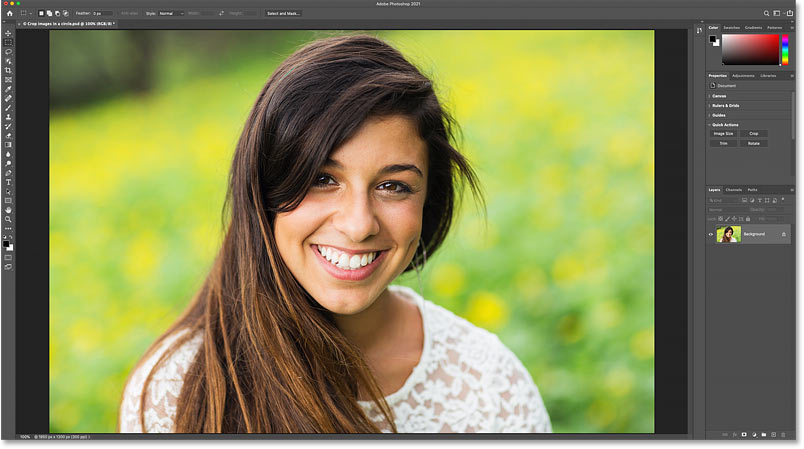
The original prototype. Photograph credit: Adobe Stock.
Related: How to get your images into Photoshop
Step 2: Unlock the Groundwork layer
In the Layers panel, the image appears on the Background layer:
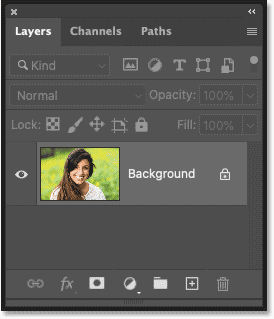
Photoshop'south Layers panel.
Before cropping the epitome to a circle, the Groundwork layer needs to be converted into a normal layer. That'southward because the areas effectually the circumvolve will demand to be transparent, and Background layers do not support transparency.
To convert the Groundwork layer to a normal layer, just click on its lock icon. If yous're using an older version of Photoshop and clicking the lock icon does not work, press and hold the Alt (Win) / Pick (Mac) key on your keyboard and double-click on the Groundwork layer:
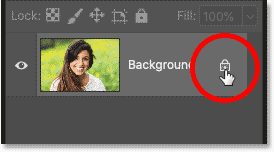
Clicking the lock icon.
Photoshop renames the Background layer to "Layer 0" and we're ready to crop the epitome into a circumvolve:
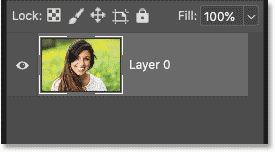
The Background layer is at present a normal layer.
Step iii: Select the Elliptical Marquee Tool
Select the Elliptical Marquee Tool from the toolbar. Past default, the Elliptical Marquee Tool is hiding behind the Rectangular Marquee Tool. So you'll demand to correct-click (Win) / Control-click (Mac) on the Rectangular Marquee Tool and then cull the Elliptical Marquee Tool from the carte:
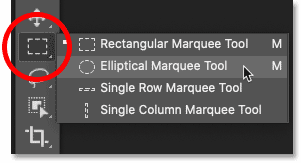
Selecting the Elliptical Marquee Tool.
Step 4: Draw a round selection outline
Click on your prototype and begin dragging out an elliptical selection outline. To force the choice outline into a perfect circle, press and concur the Shift key on your keyboard as you drag.
Don't worry about getting the circumvolve's location within the paradigm exactly correct. We'll move it into position in the next step. For now, only make sure the circle is big enough to surround the area you want to go along.
When you're done, release your mouse button and then release the Shift key. Make certain you release your mouse button get-go, and then the Shift key, or the choice outline will snap back into a freeform elliptical shape:

Press and hold Shift and elevate out a circular pick outline.
Step 5: Reposition the selection outline
To reposition the choice outline effectually your field of study, click inside the outline and drag information technology into place. Here I'm moving it to center the adult female'south confront within the circle. This is the area I want to keep. The rest of the image exterior the circle will be cropped abroad.
Note that in the screenshot below, the magenta line running from acme to bottom through the epitome is just ane of Photoshop's Smart Guides, telling me that the selection outline is now vertically centered in the document. Smart Guides disappear when yous release your mouse button:
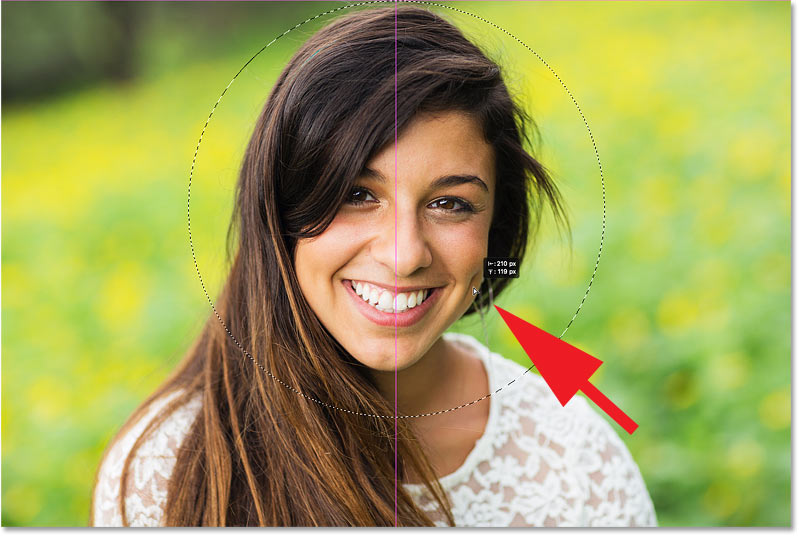
Click and drag the circular choice outline into identify.
Step 6: Invert the selection
The only trouble is that we've selected the area inside the circle, when what we really need is to select everything outside the circumvolve, since that'south the area we want to crop away.
To set up that, invert the option by going up to the Select card in the Menu Bar and choosing Changed:
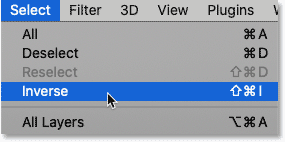
Going to Select > Inverse.
Step 7: Delete the image outside the circle
And then with the option inverted, delete the area around the circle by pressing the Backspace (Win) / Delete (Mac) central on your keyboard. The deleted area is replaced with a checkerboard pattern which is how Photoshop represents transparency.
If the deleted area becomes white instead of transparent, or Photoshop opens the Fill dialog box, it's most likely because yous forgot to unlock the Groundwork layer back in Step ane:

Press Backspace (Win) / Delete (Mac) to delete the image around the circle.
We don't demand our selection outline anymore, so remove information technology by going up to the Select carte and choosing Deselect:
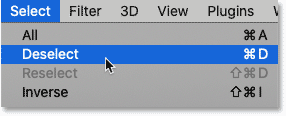
Going to Select > Deselect.
Footstep 8: Crop away the transparent areas
To crop the image effectually the circle and trim away the transparent areas, get up to the Paradigm menu and choose Trim:
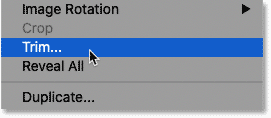
Going to Epitome > Trim.
Then in the Trim dialog box, cull Transparent Pixels at the top, and make sure that Acme, Bottom, Left and Right are all selected at the lesser:
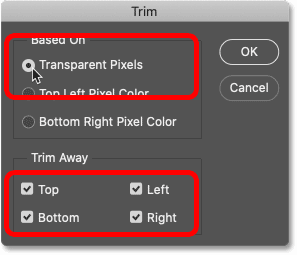
The Trim options.
Click OK to close the Trim dialog box, and Photoshop instantly trims away the surrounding transparent areas, leaving us with our epitome cropped as a circle.
Since the corners are transparent, whatever background we identify the image onto volition bear witness through the corners while the image in the circle remains visible:
The image is now cropped to a circumvolve.
Step 9: Salve the image every bit a PNG file
To keep those corners transparent, we need to salvage the image in a file format that supports transparency. The JPEG format does not, but PNG does. And PNG is widely supported in web browsers, making it a smashing choice.
To save the prototype as a PNG file, get up to the File menu and choose Salve As:
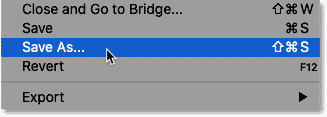
Going to File > Save Every bit.
In the most recent versions of Photoshop, you'll exist asked if you want to save the file to your computer or equally a cloud certificate. Choose Salvage on your computer:
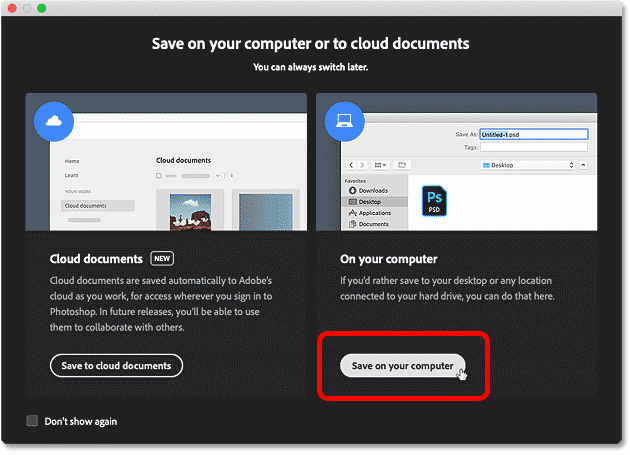
Choosing the "Salve on your computer" choice.
Then in the Save As dialog box, set the Format option to PNG. Name your file, choose where you want to save it, and then click Save:
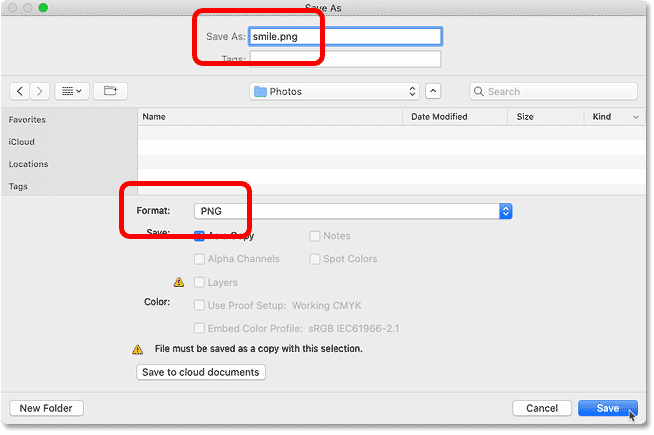
Saving the cropped image as a PNG file.
Finally, in the PNG Format Options, cull Smallest file size and and so click OK to relieve the image:
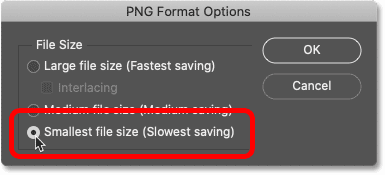
Saving the PNG file at the smallest size.
And there we take it! That's how to crop an image in a circumvolve in Photoshop! And that brings us to the end of our serial on cropping images in Photoshop!
Yous can jump to whatever of the other lessons in this Cropping Images in Photoshop series. Or visit our Photoshop Basics section for more topics!
Other Stuff
© 2022 Photoshop Essentials.com.
For inspiration, not duplication.
Site blueprint by Steve Patterson.
Photoshop is a trademark of Adobe Systems Inc.
Source: https://www.photoshopessentials.com/basics/crop-image-circle-photoshop/
Post a Comment for "Draw Lines Around a Circle in Photoshop"